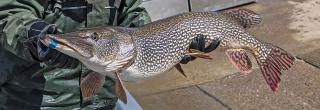
Removing Y Bones from Northern Pike
Removing the Y bones from northern pike can be daunting and may prevent some anglers from enjoying these very tasty fish.
Learn how to remove these pesky bones in thi short tutorial video (written instructions and images can be found below on this page).
And once you have those bones removed, here are a few pike recipes to try.
Steps To Remove Y Bones
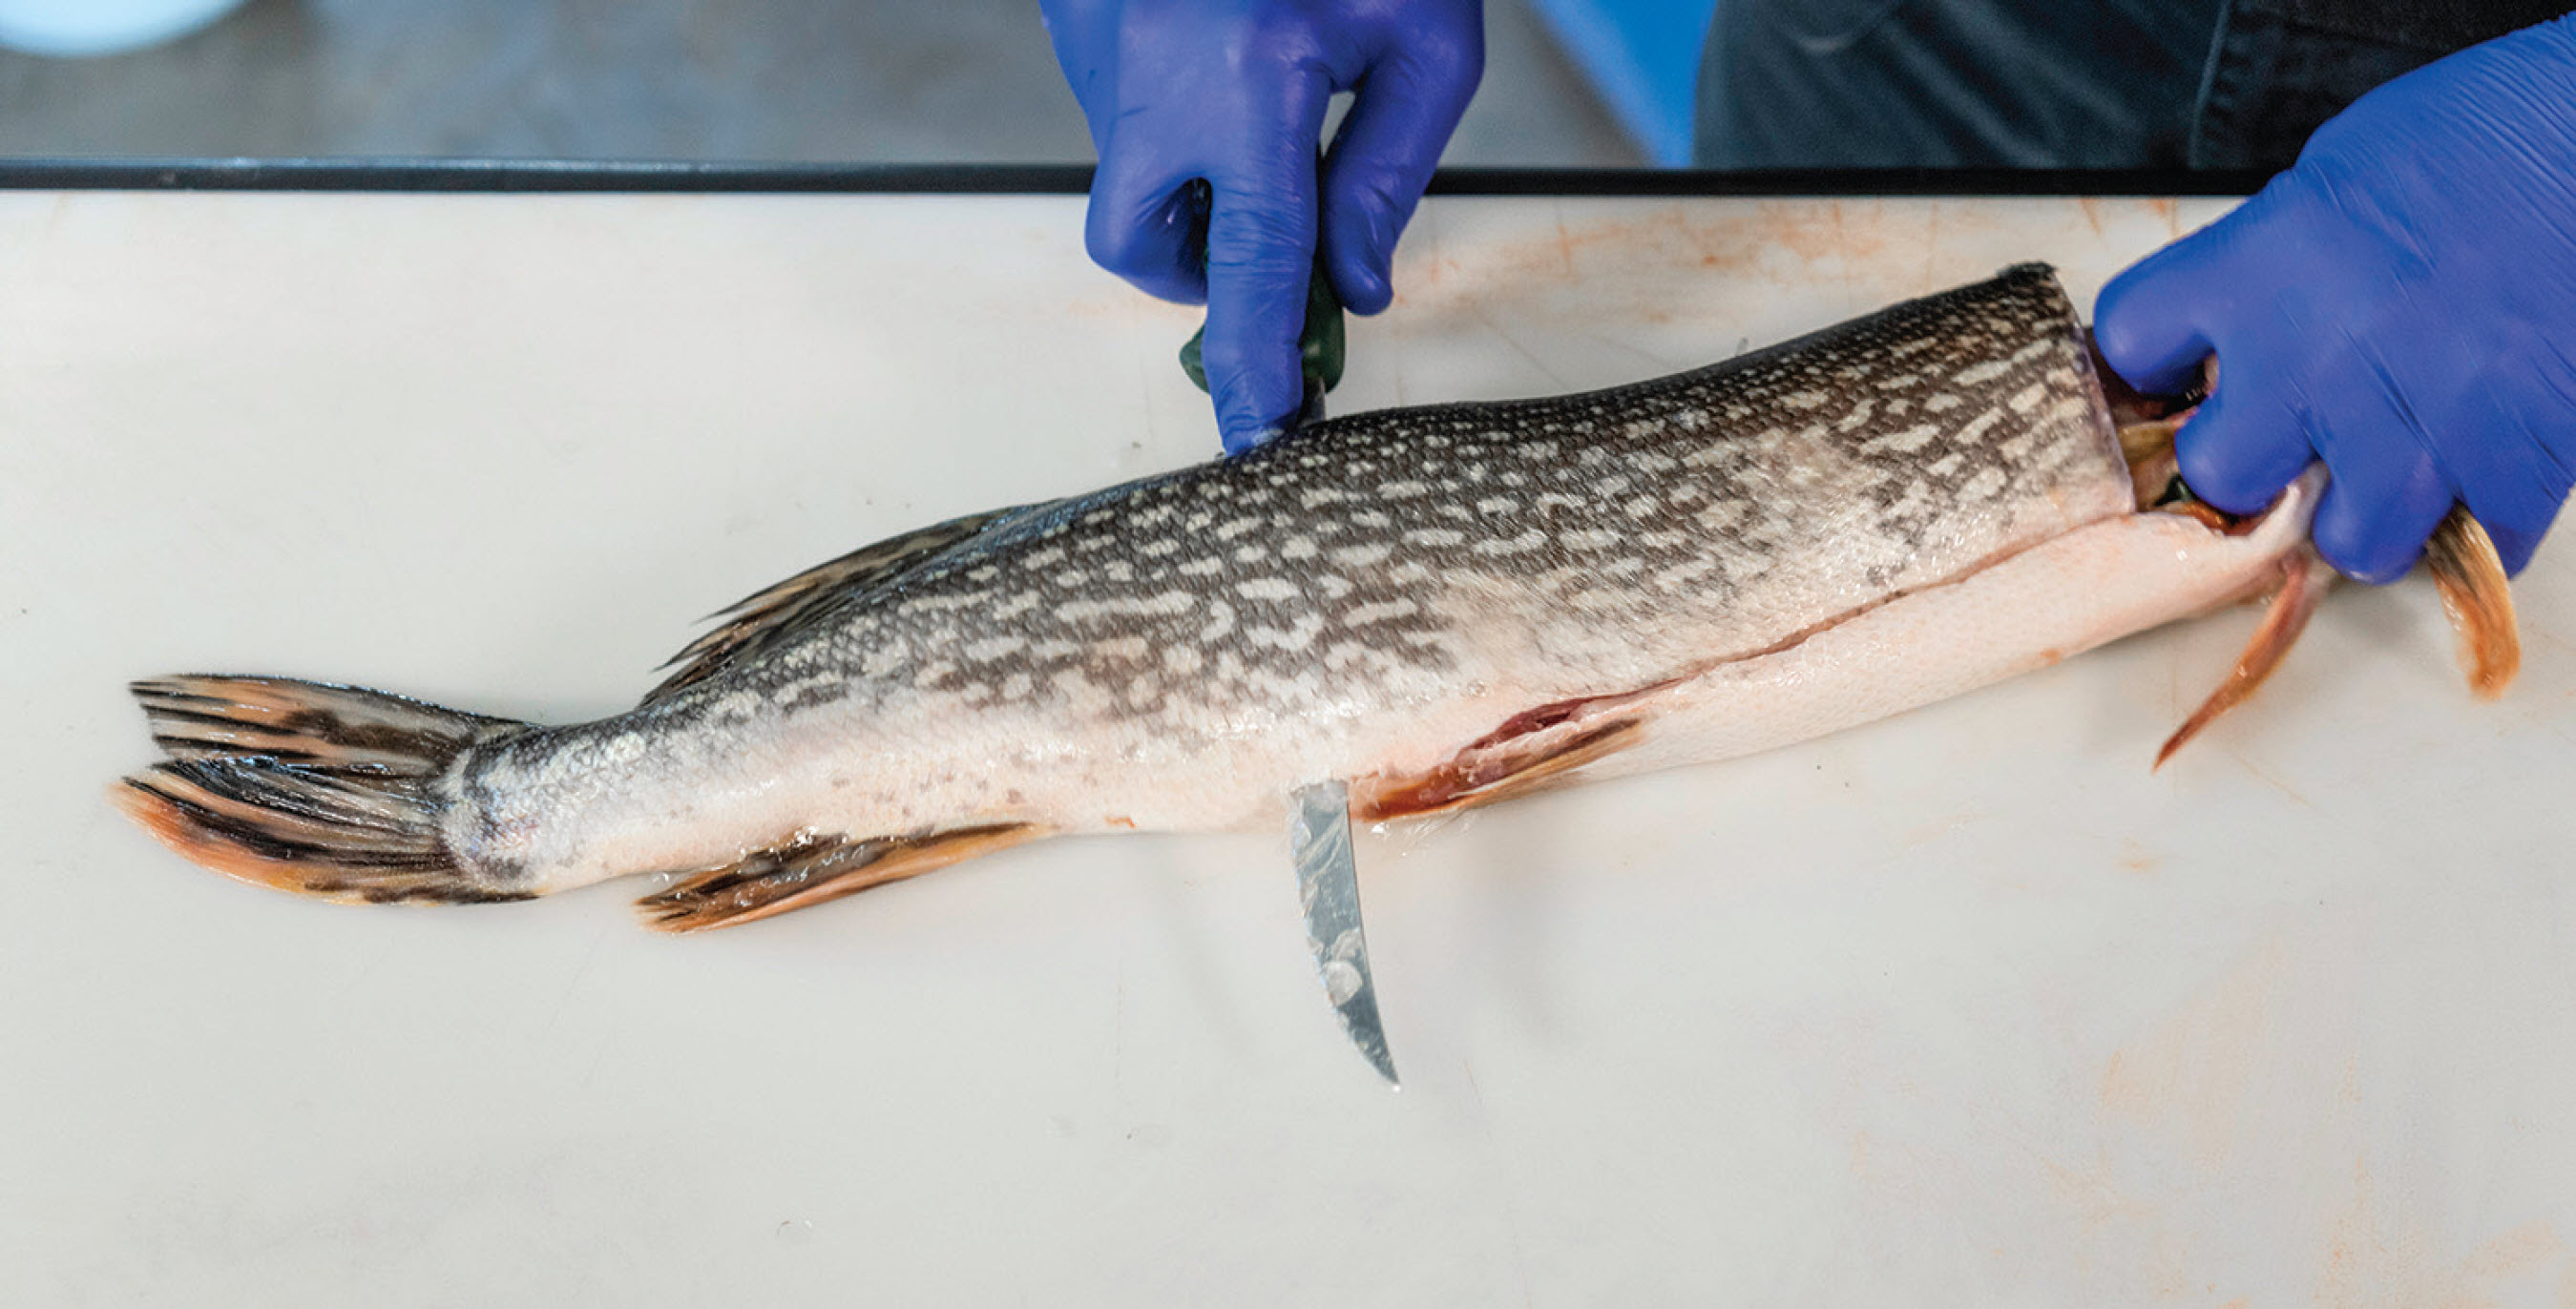
Step 1
Remove the fillet from the body of the fish.
As for any meat processing, a sharp and flexible fillet knife makes a world of difference between an easy task and a frustrating one.
Keep the skin on the fillet for now, it will be removed in a later step.
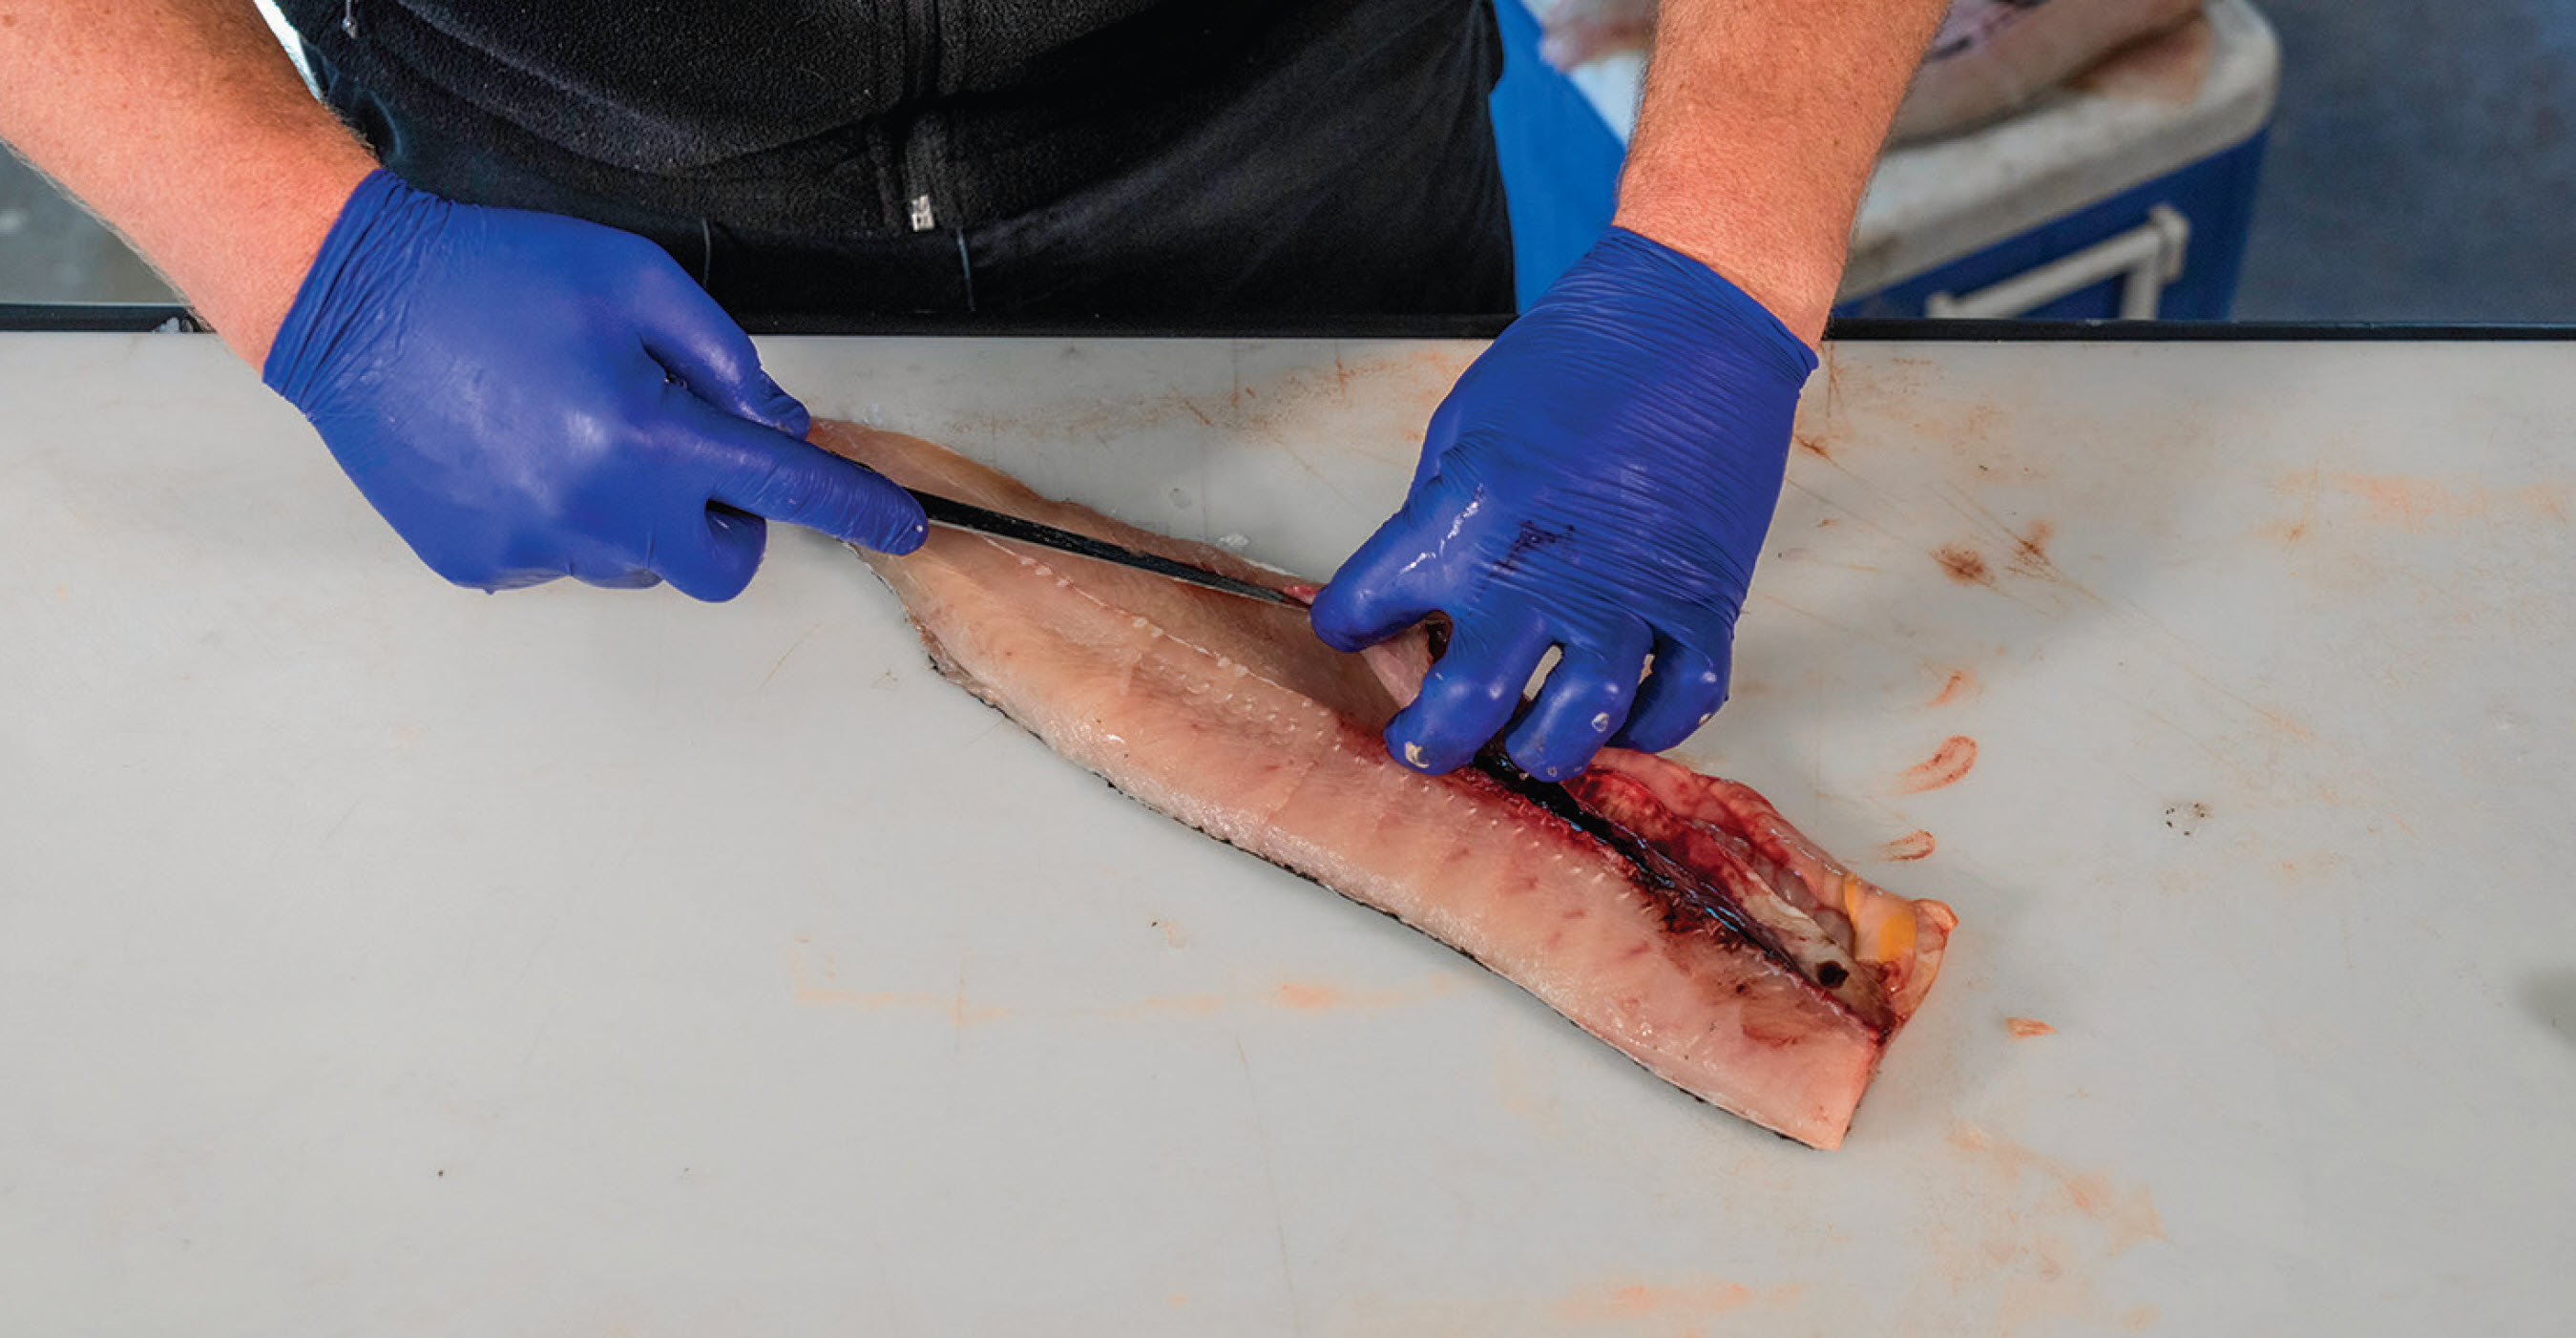
Step 2
Remove the rib bones.
The cut should start along the top edge of the rib cage.
The knife blade should be nearly parallel to the cutting board, but angled slightly downward.
Slice under the rib bones, working the blade toward the belly.
Slicing under the rib bones with a little upward pressure on the knife will ensure a cut close to the rib bones so no meat is wasted.
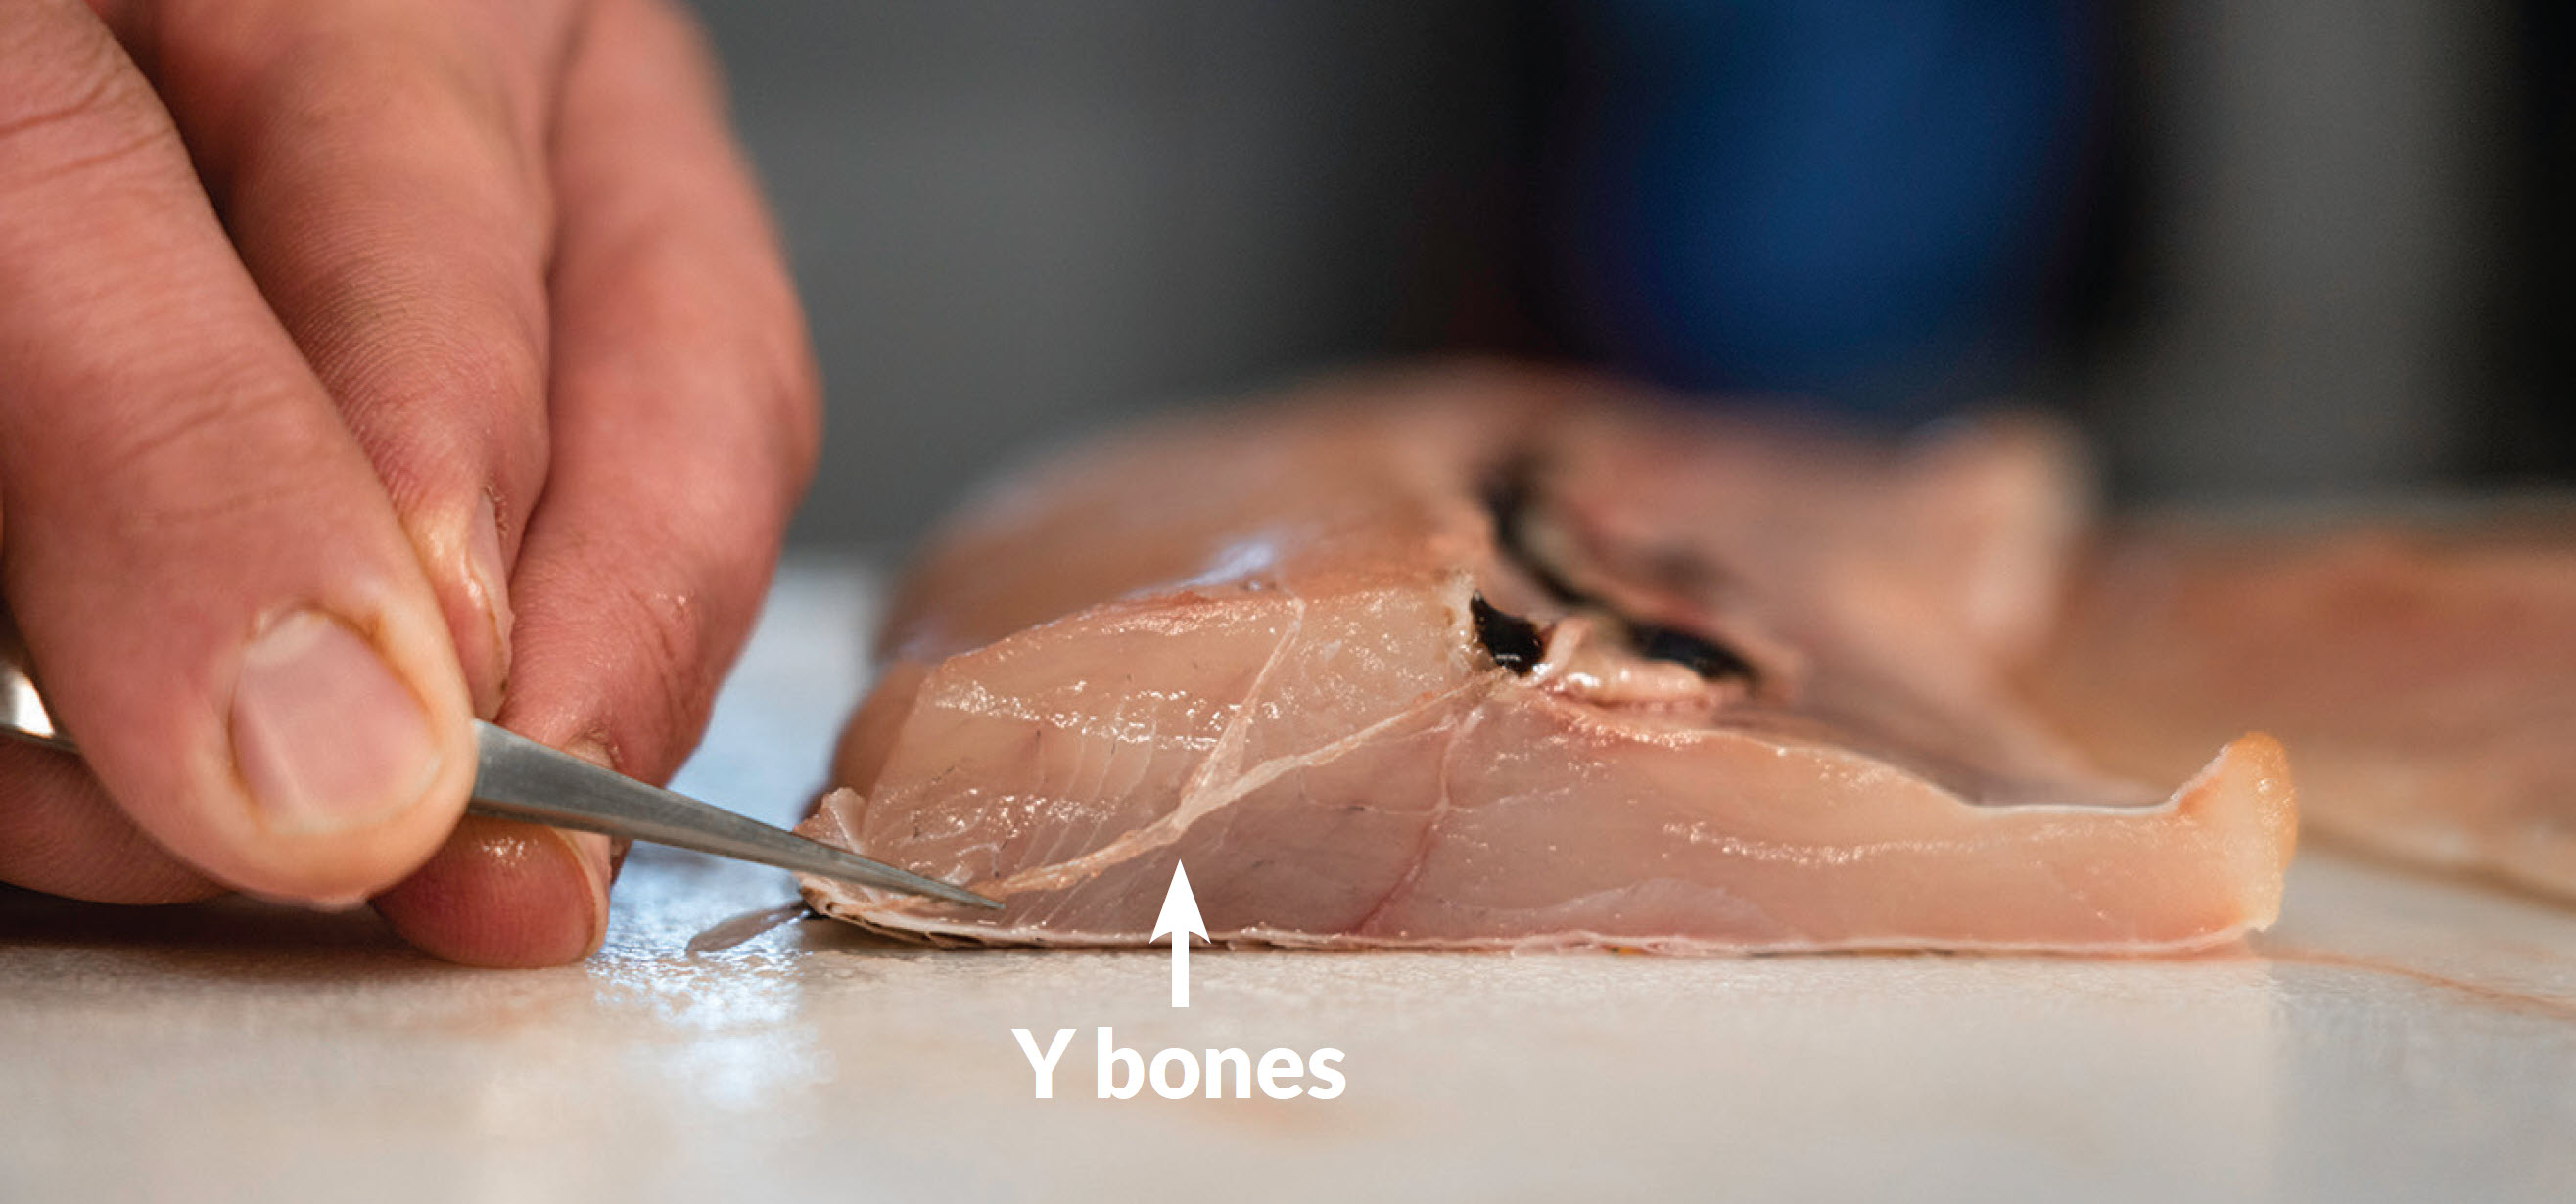
View of the Y Bones
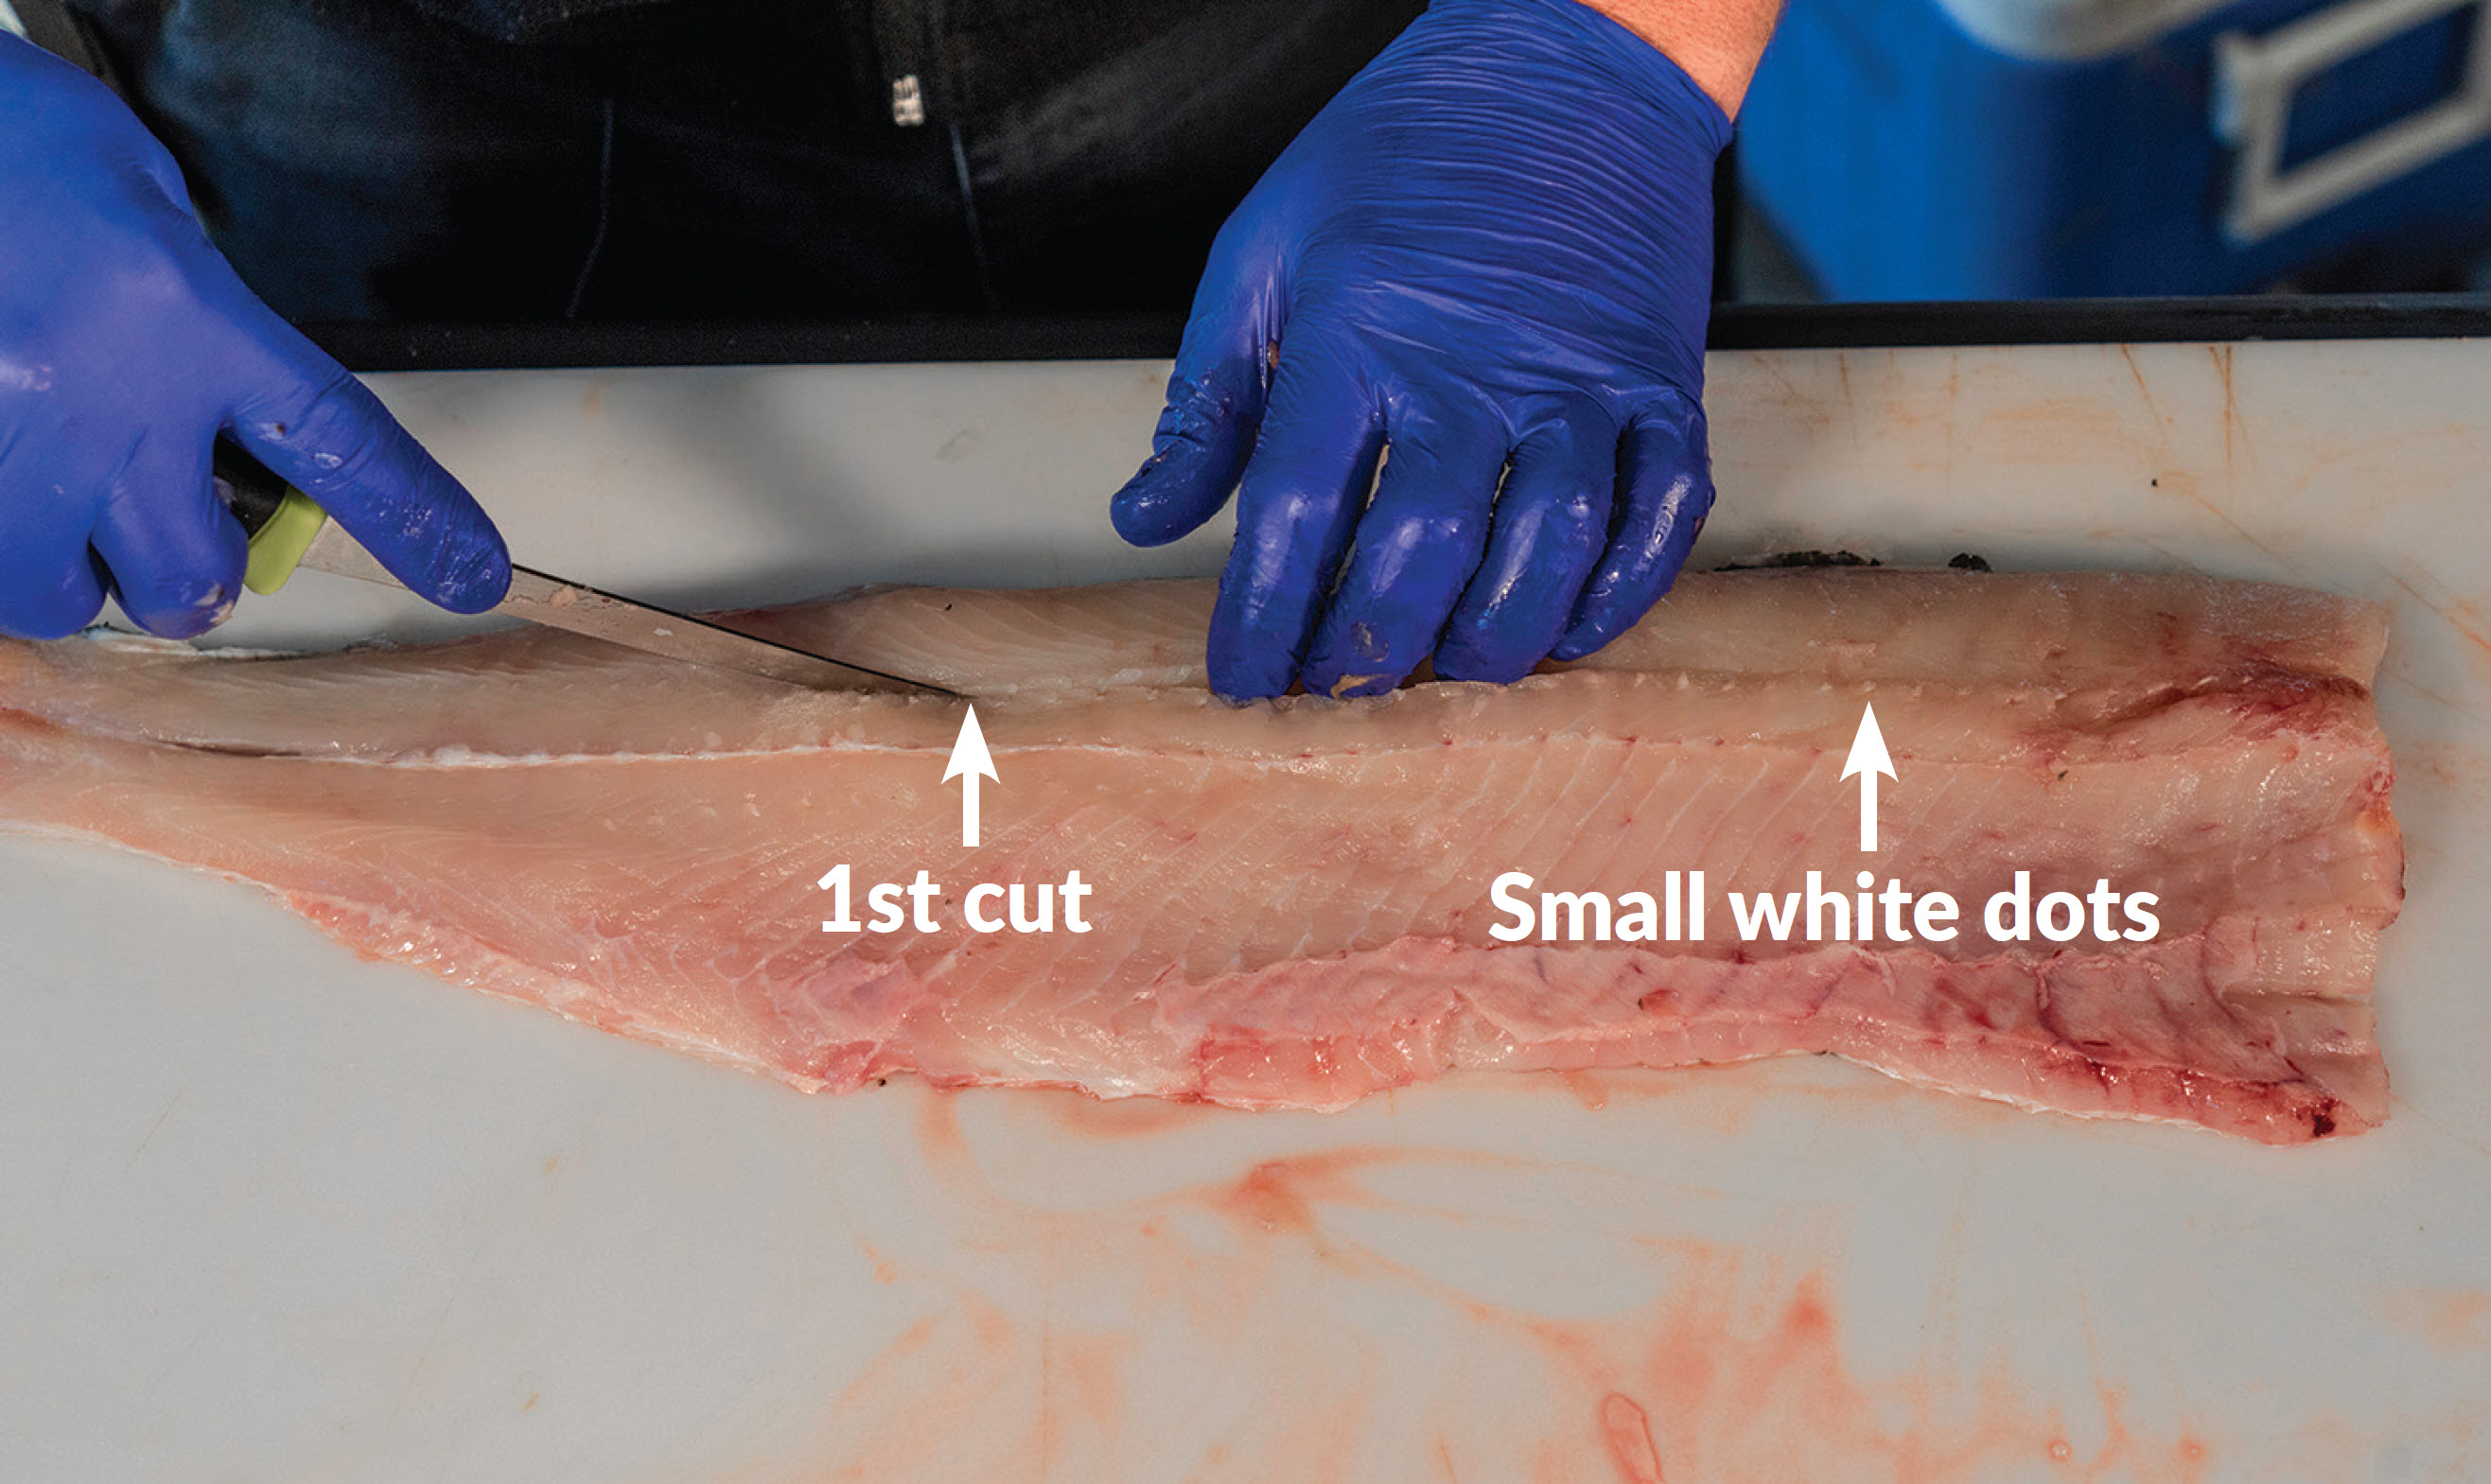
The Y bones are positioned along the back of the fish as shown above.
The short arm of the Y bones may be visible as little white dots, and you can feel their tips by running your finger along the fillet.
Step 3
To make the first cut, slice downward at 90 degrees to the cutting board along the top side of the visible Y bones.
Cut down gently until you feel the knife contact the Y bones, but do not cut all the way through them.
After the initial cut, turn the blade parallel to the cutting board.
Using gentle downward pressure and guiding the knife along the bones, slice toward the top of the fillet.
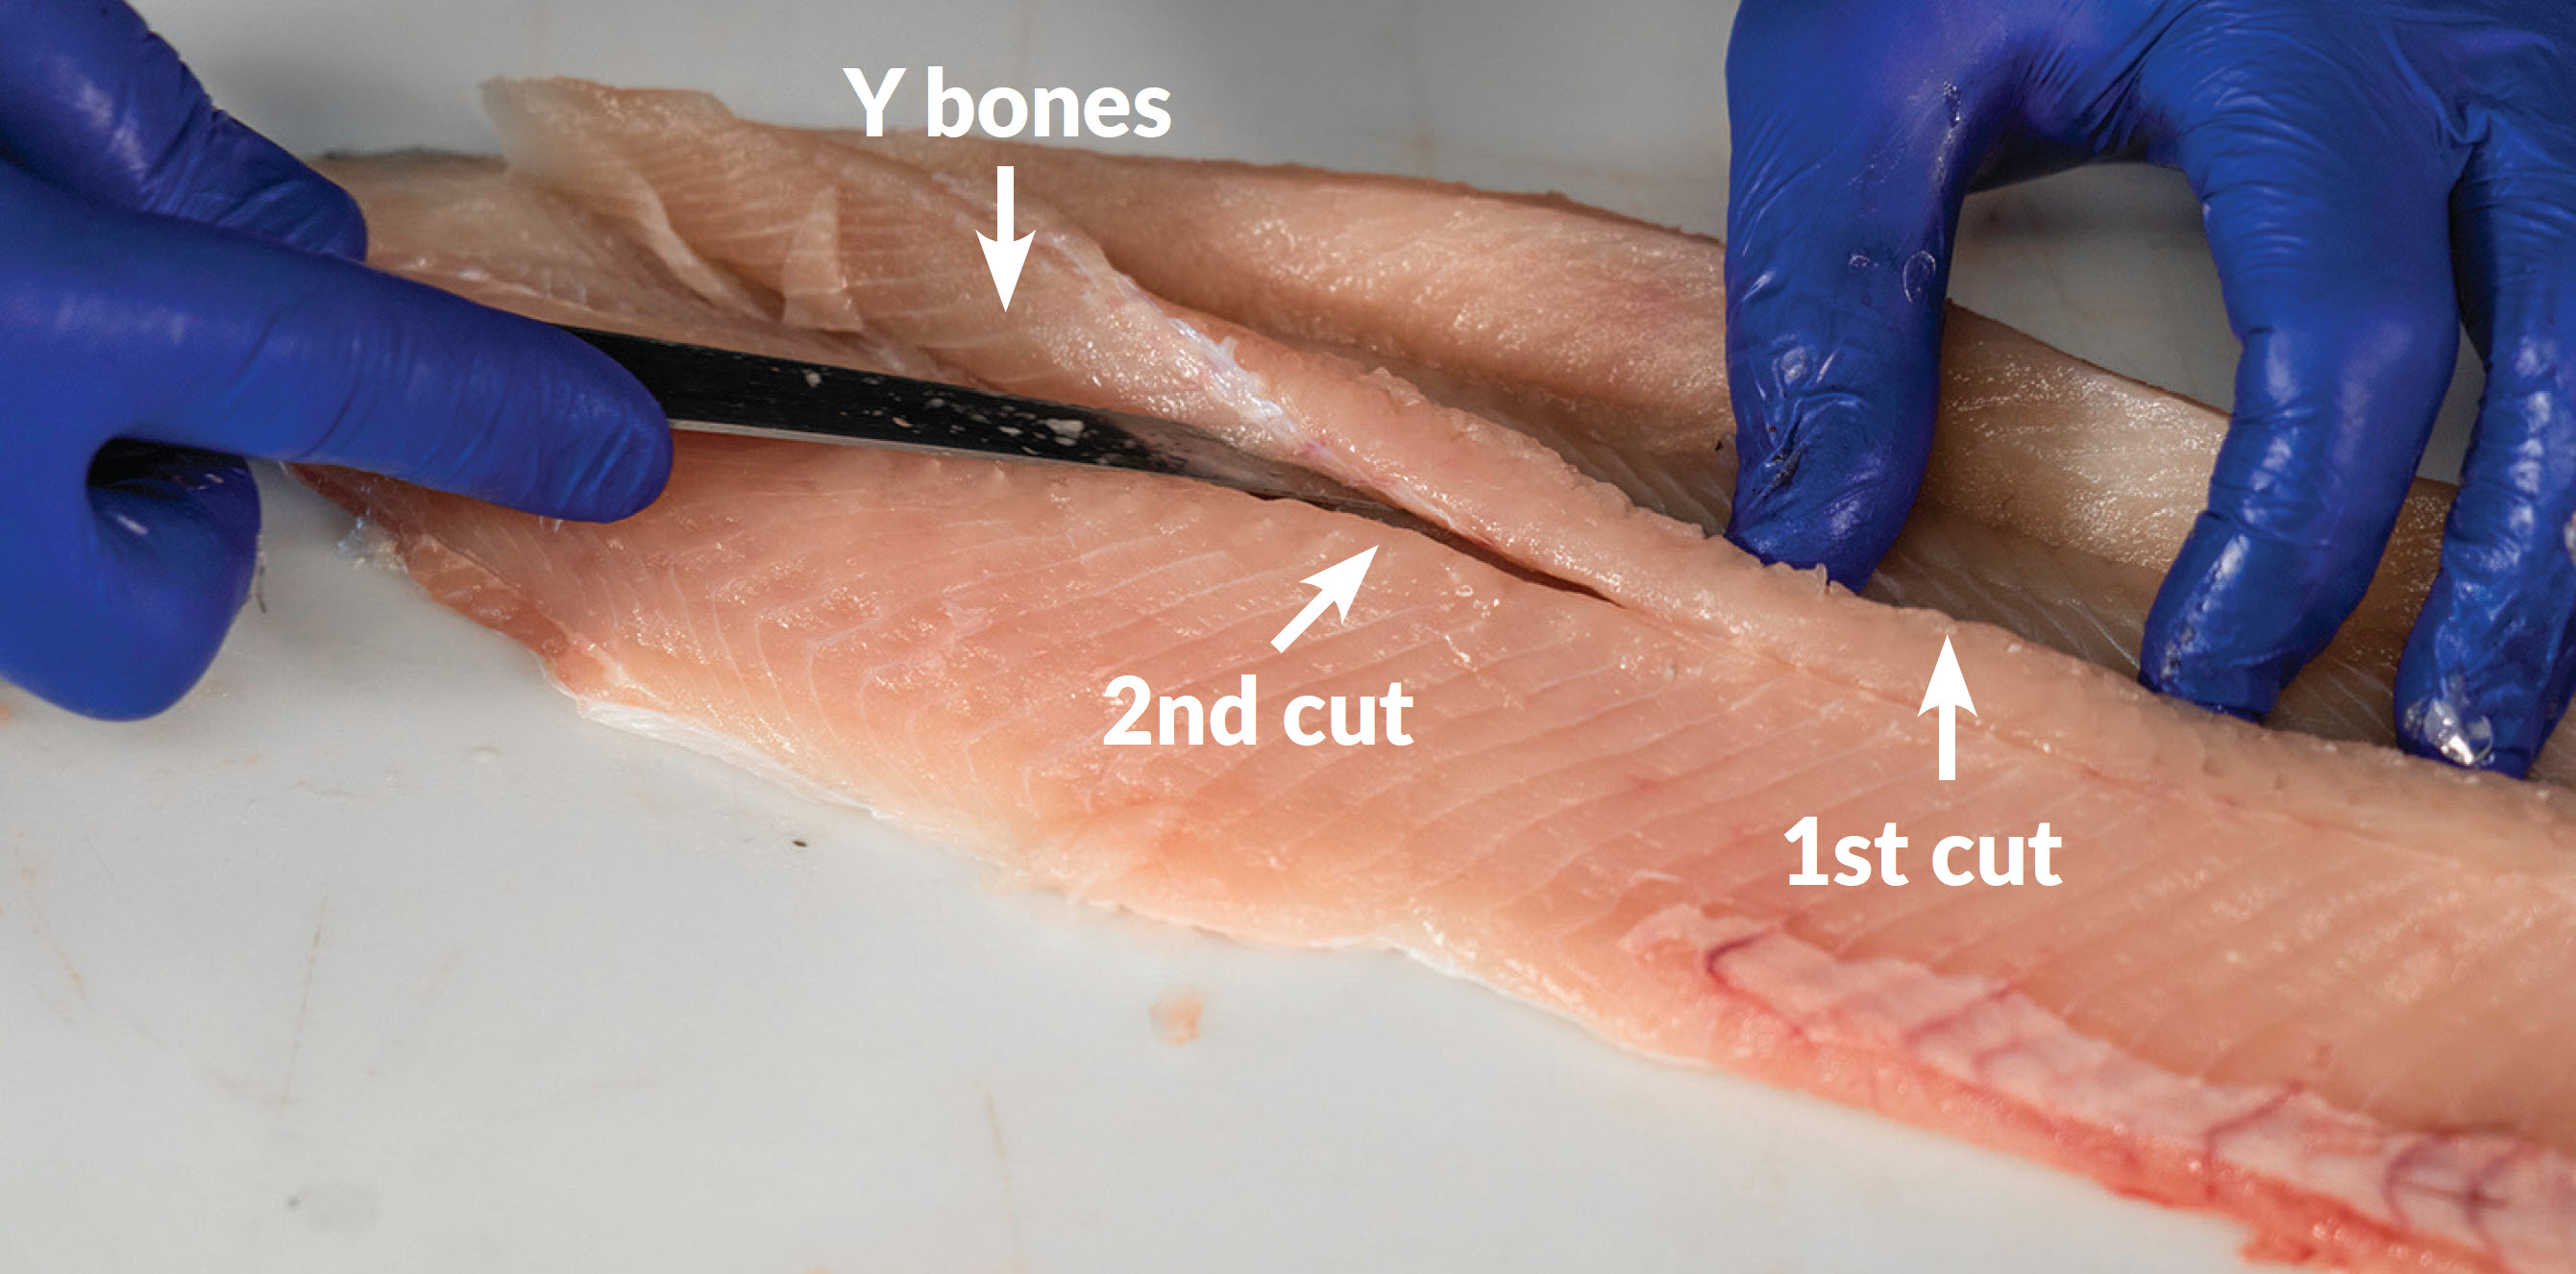
The first cut removes the meat above the Y bones, exposing them to view.
(Note: you may remove this boneless portion of meat at this point if you’re doing this at home, but to keep the fillet in one piece for transportation purposes, it’s best to stop your cut before completely removing this section.)
Step 4
The second cut will remove the Y bones.
Begin the second cut about a quarter-inch below the first cut, along the length of the fillet.
Slice under the lower short arm of the Y bone, and continue to slice under the long arm of the Y bone.
Similar to removing the rib cage, your knife should be roughly parallel to the cutting board, with gentle upward pressure to maintain contact with the Y bones.
Step 5
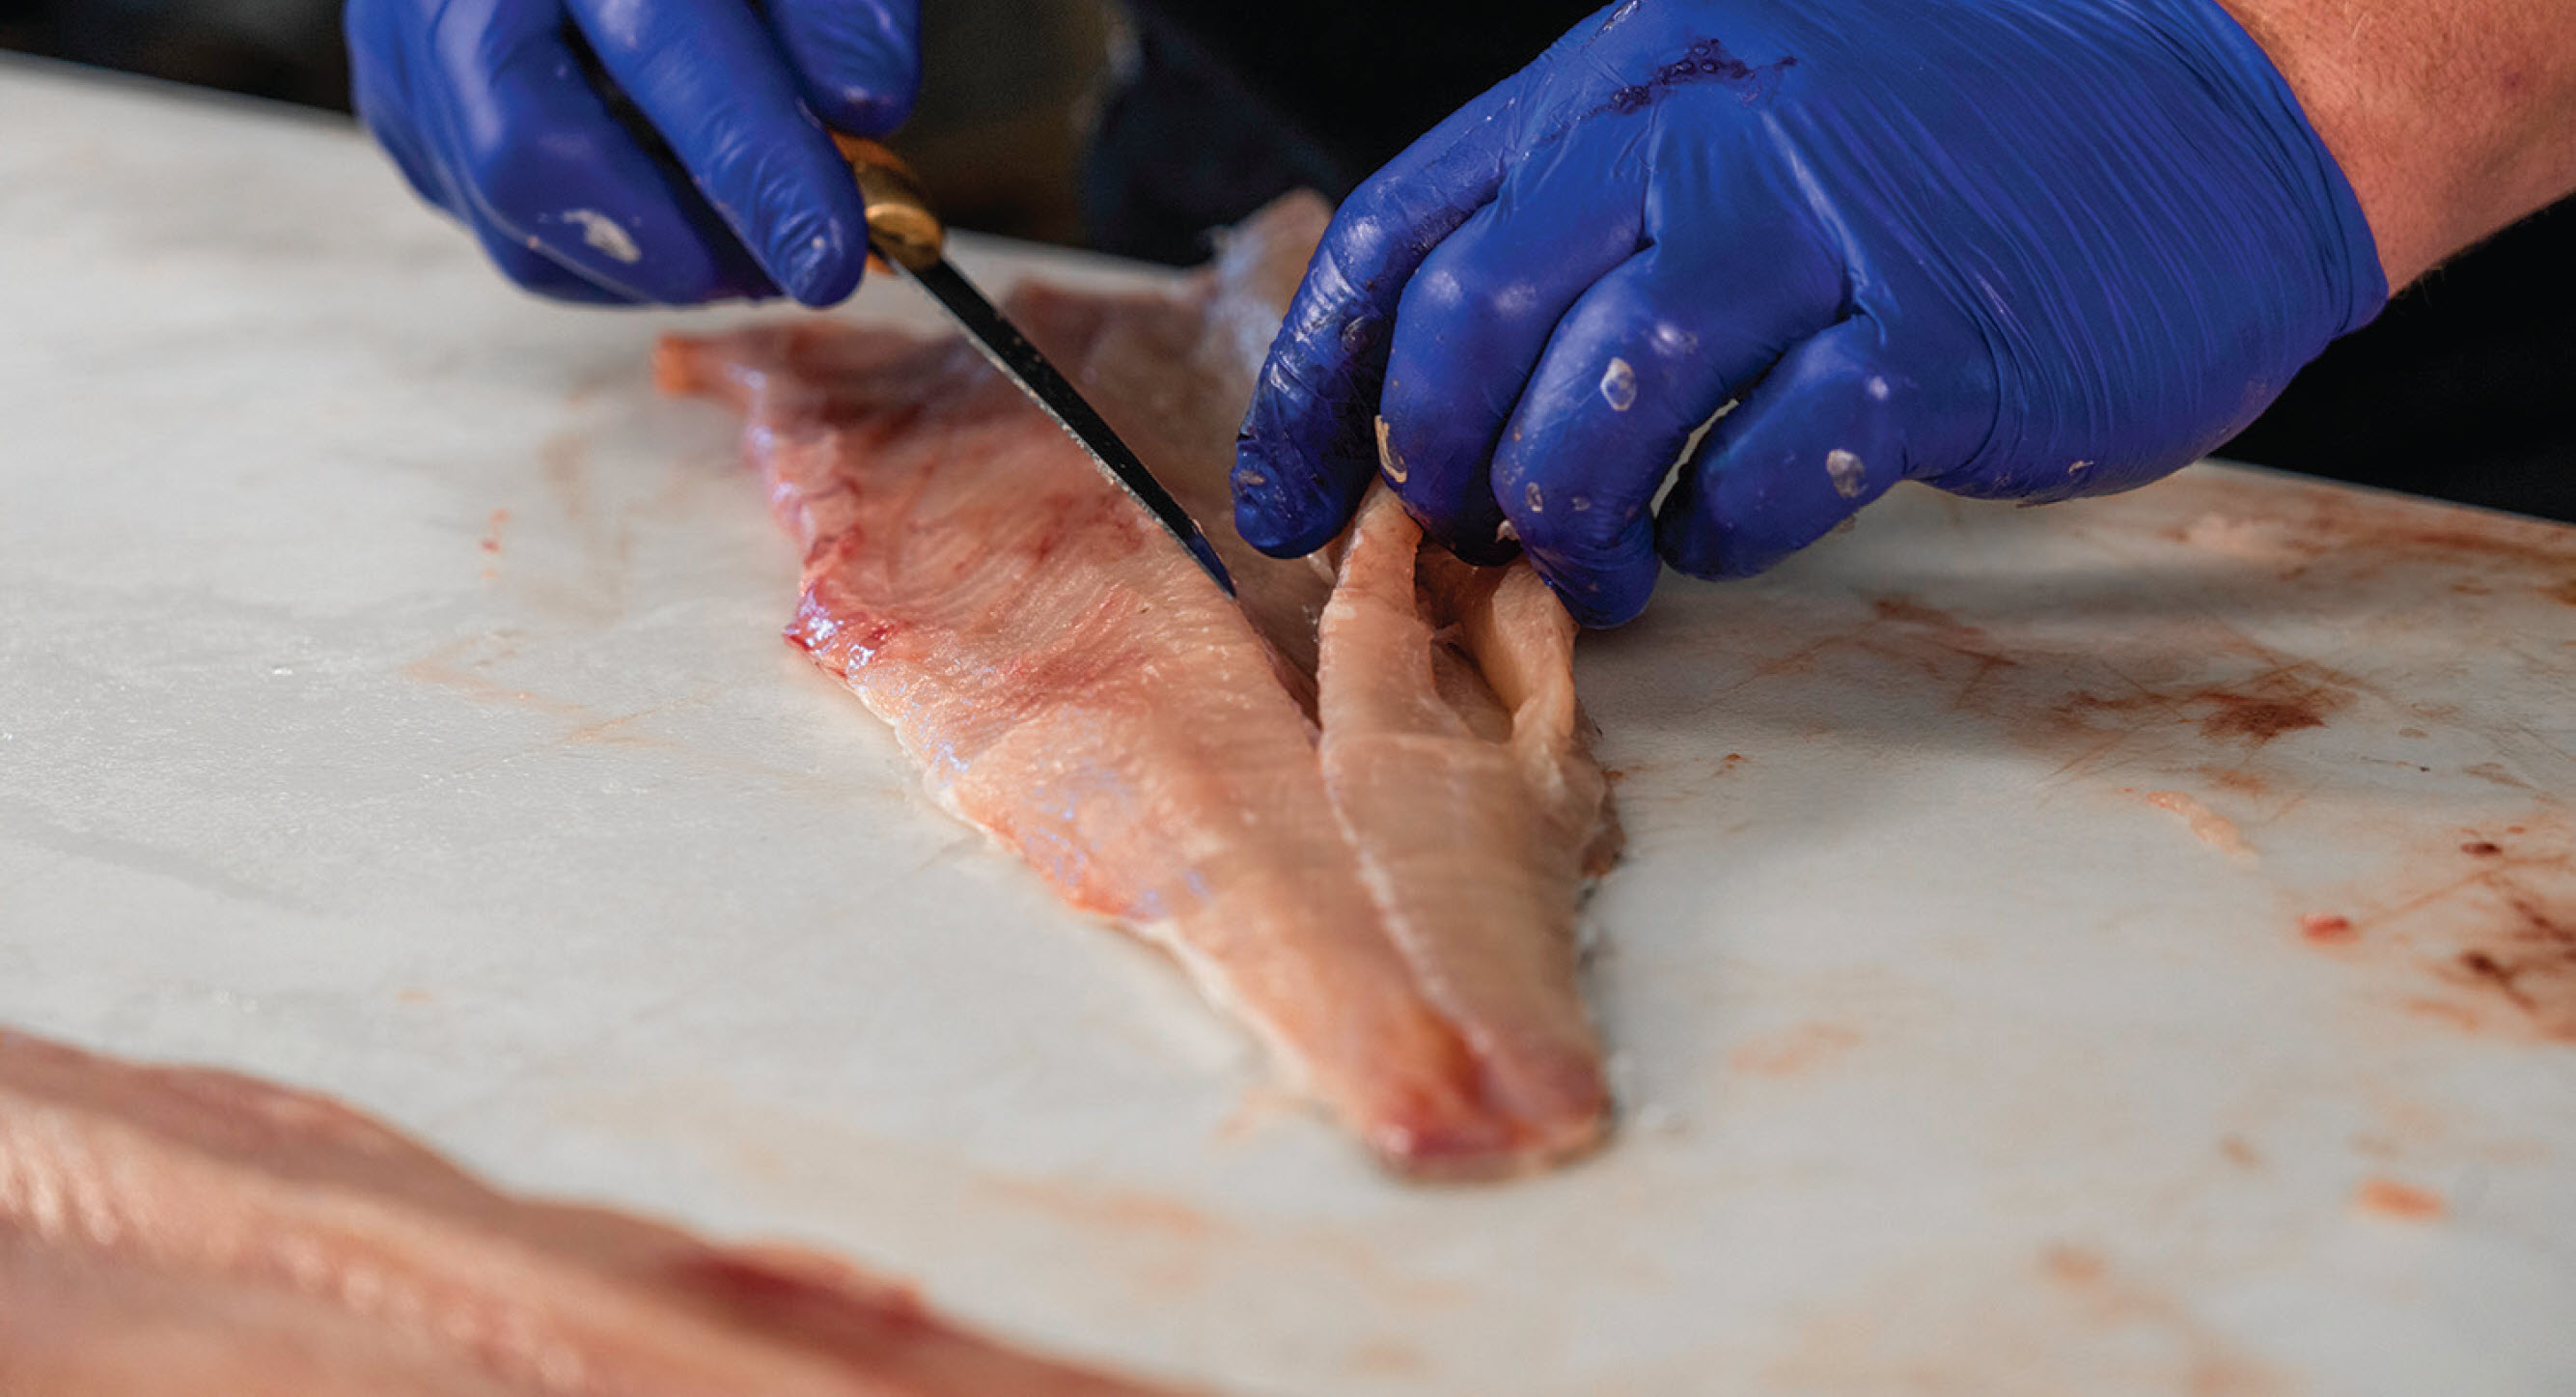
Remove the strip of meat containing the Y bones, resulting in a boneless fillet.
Step 6
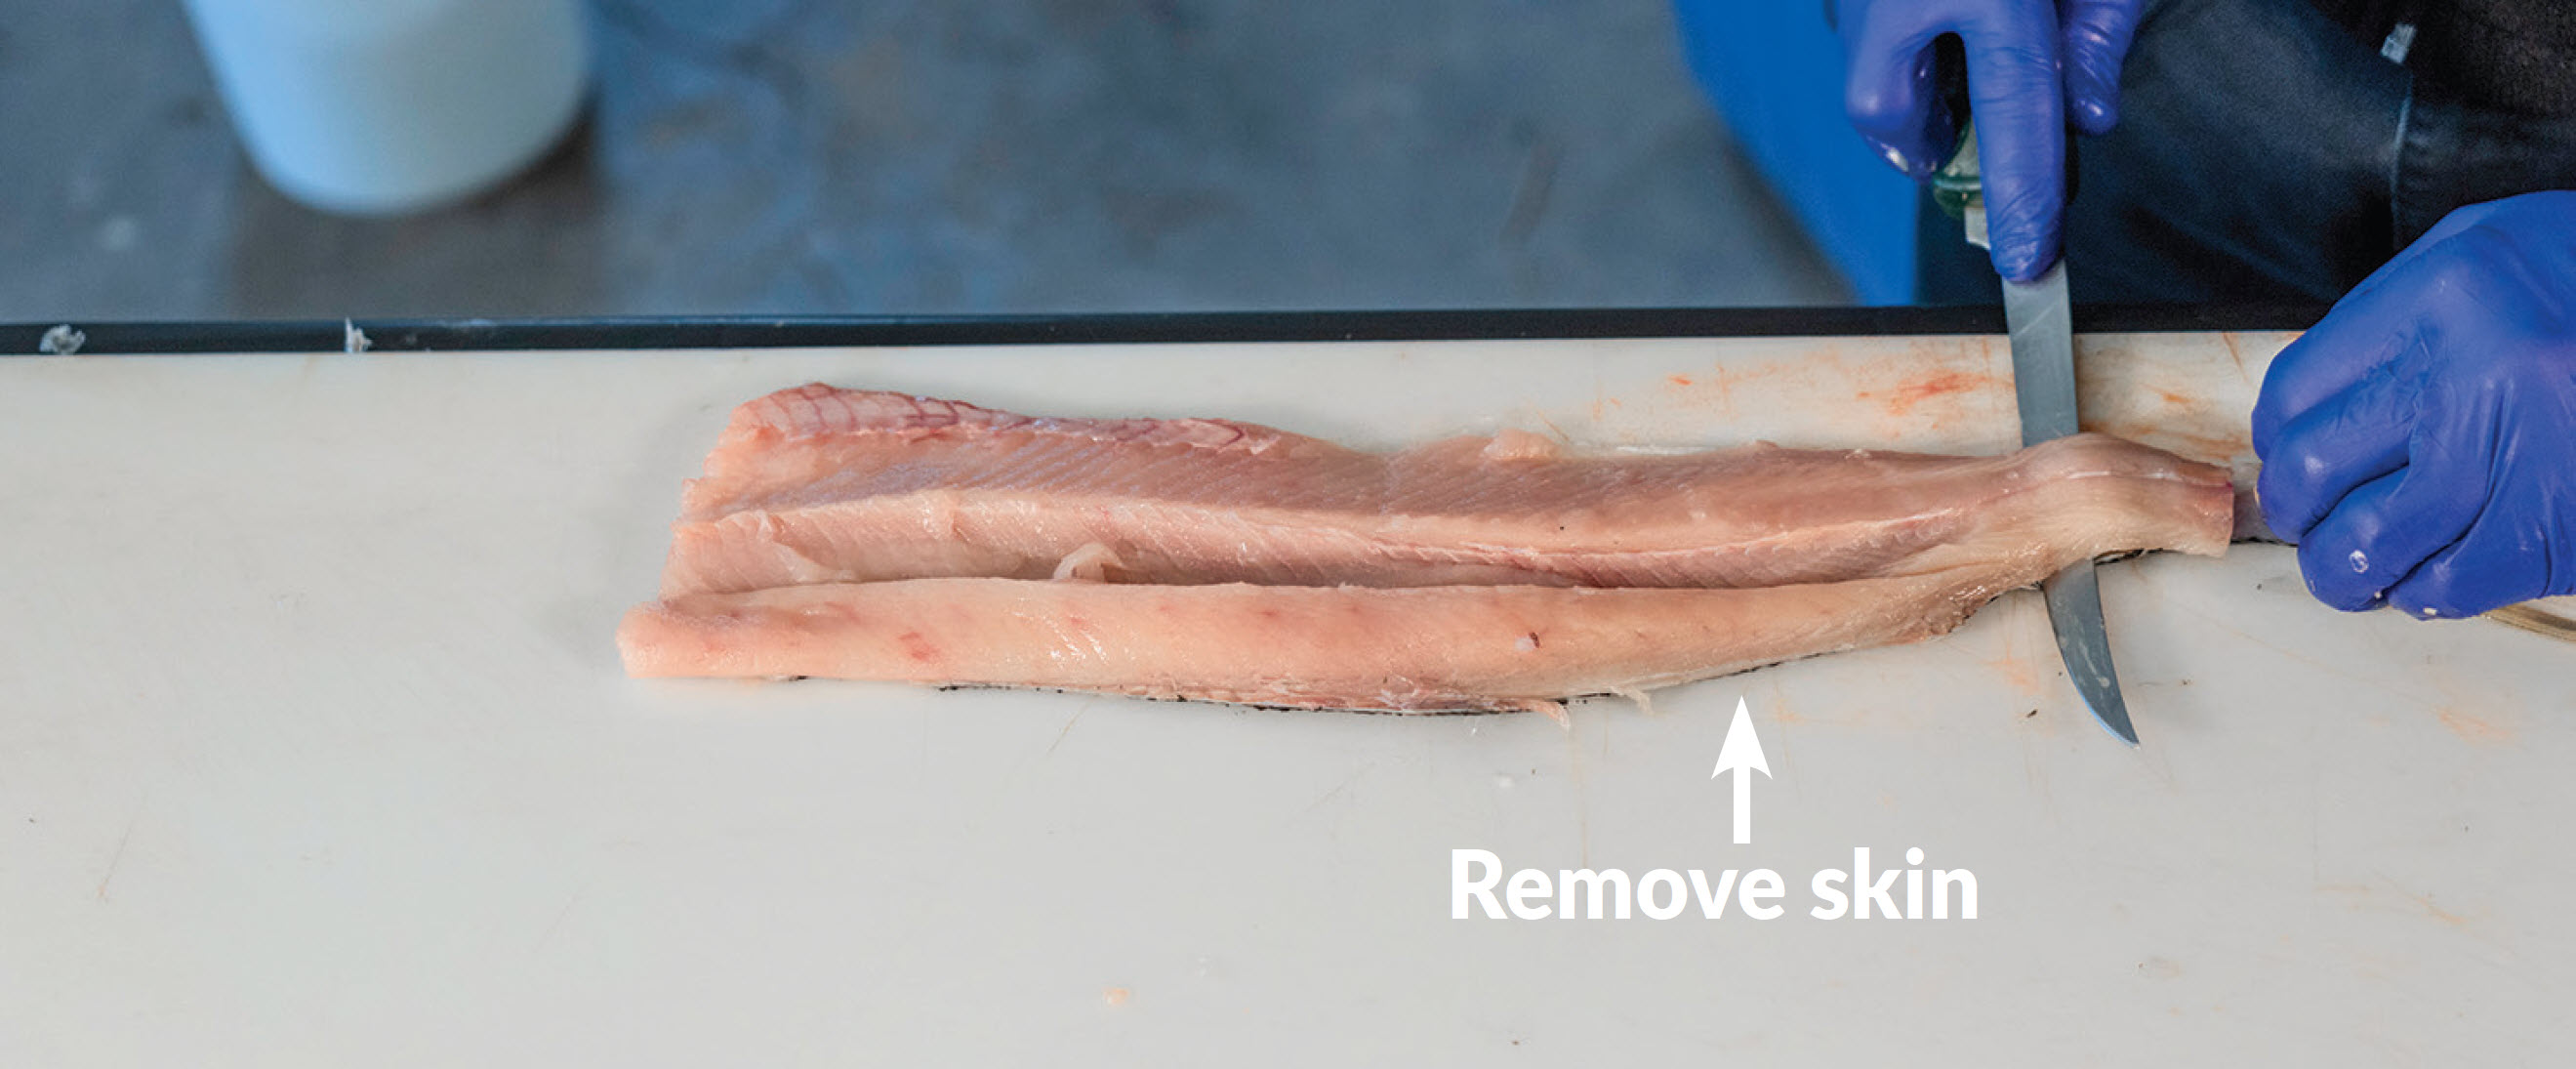
In the last step, remove the skin from the fillet.
Grasp the tail end, carefully working the knife between the fillet and the skin.
Work all the way through to the end.
Discard the skin and rinse your fillet in water to prepare for cooking or packaging.
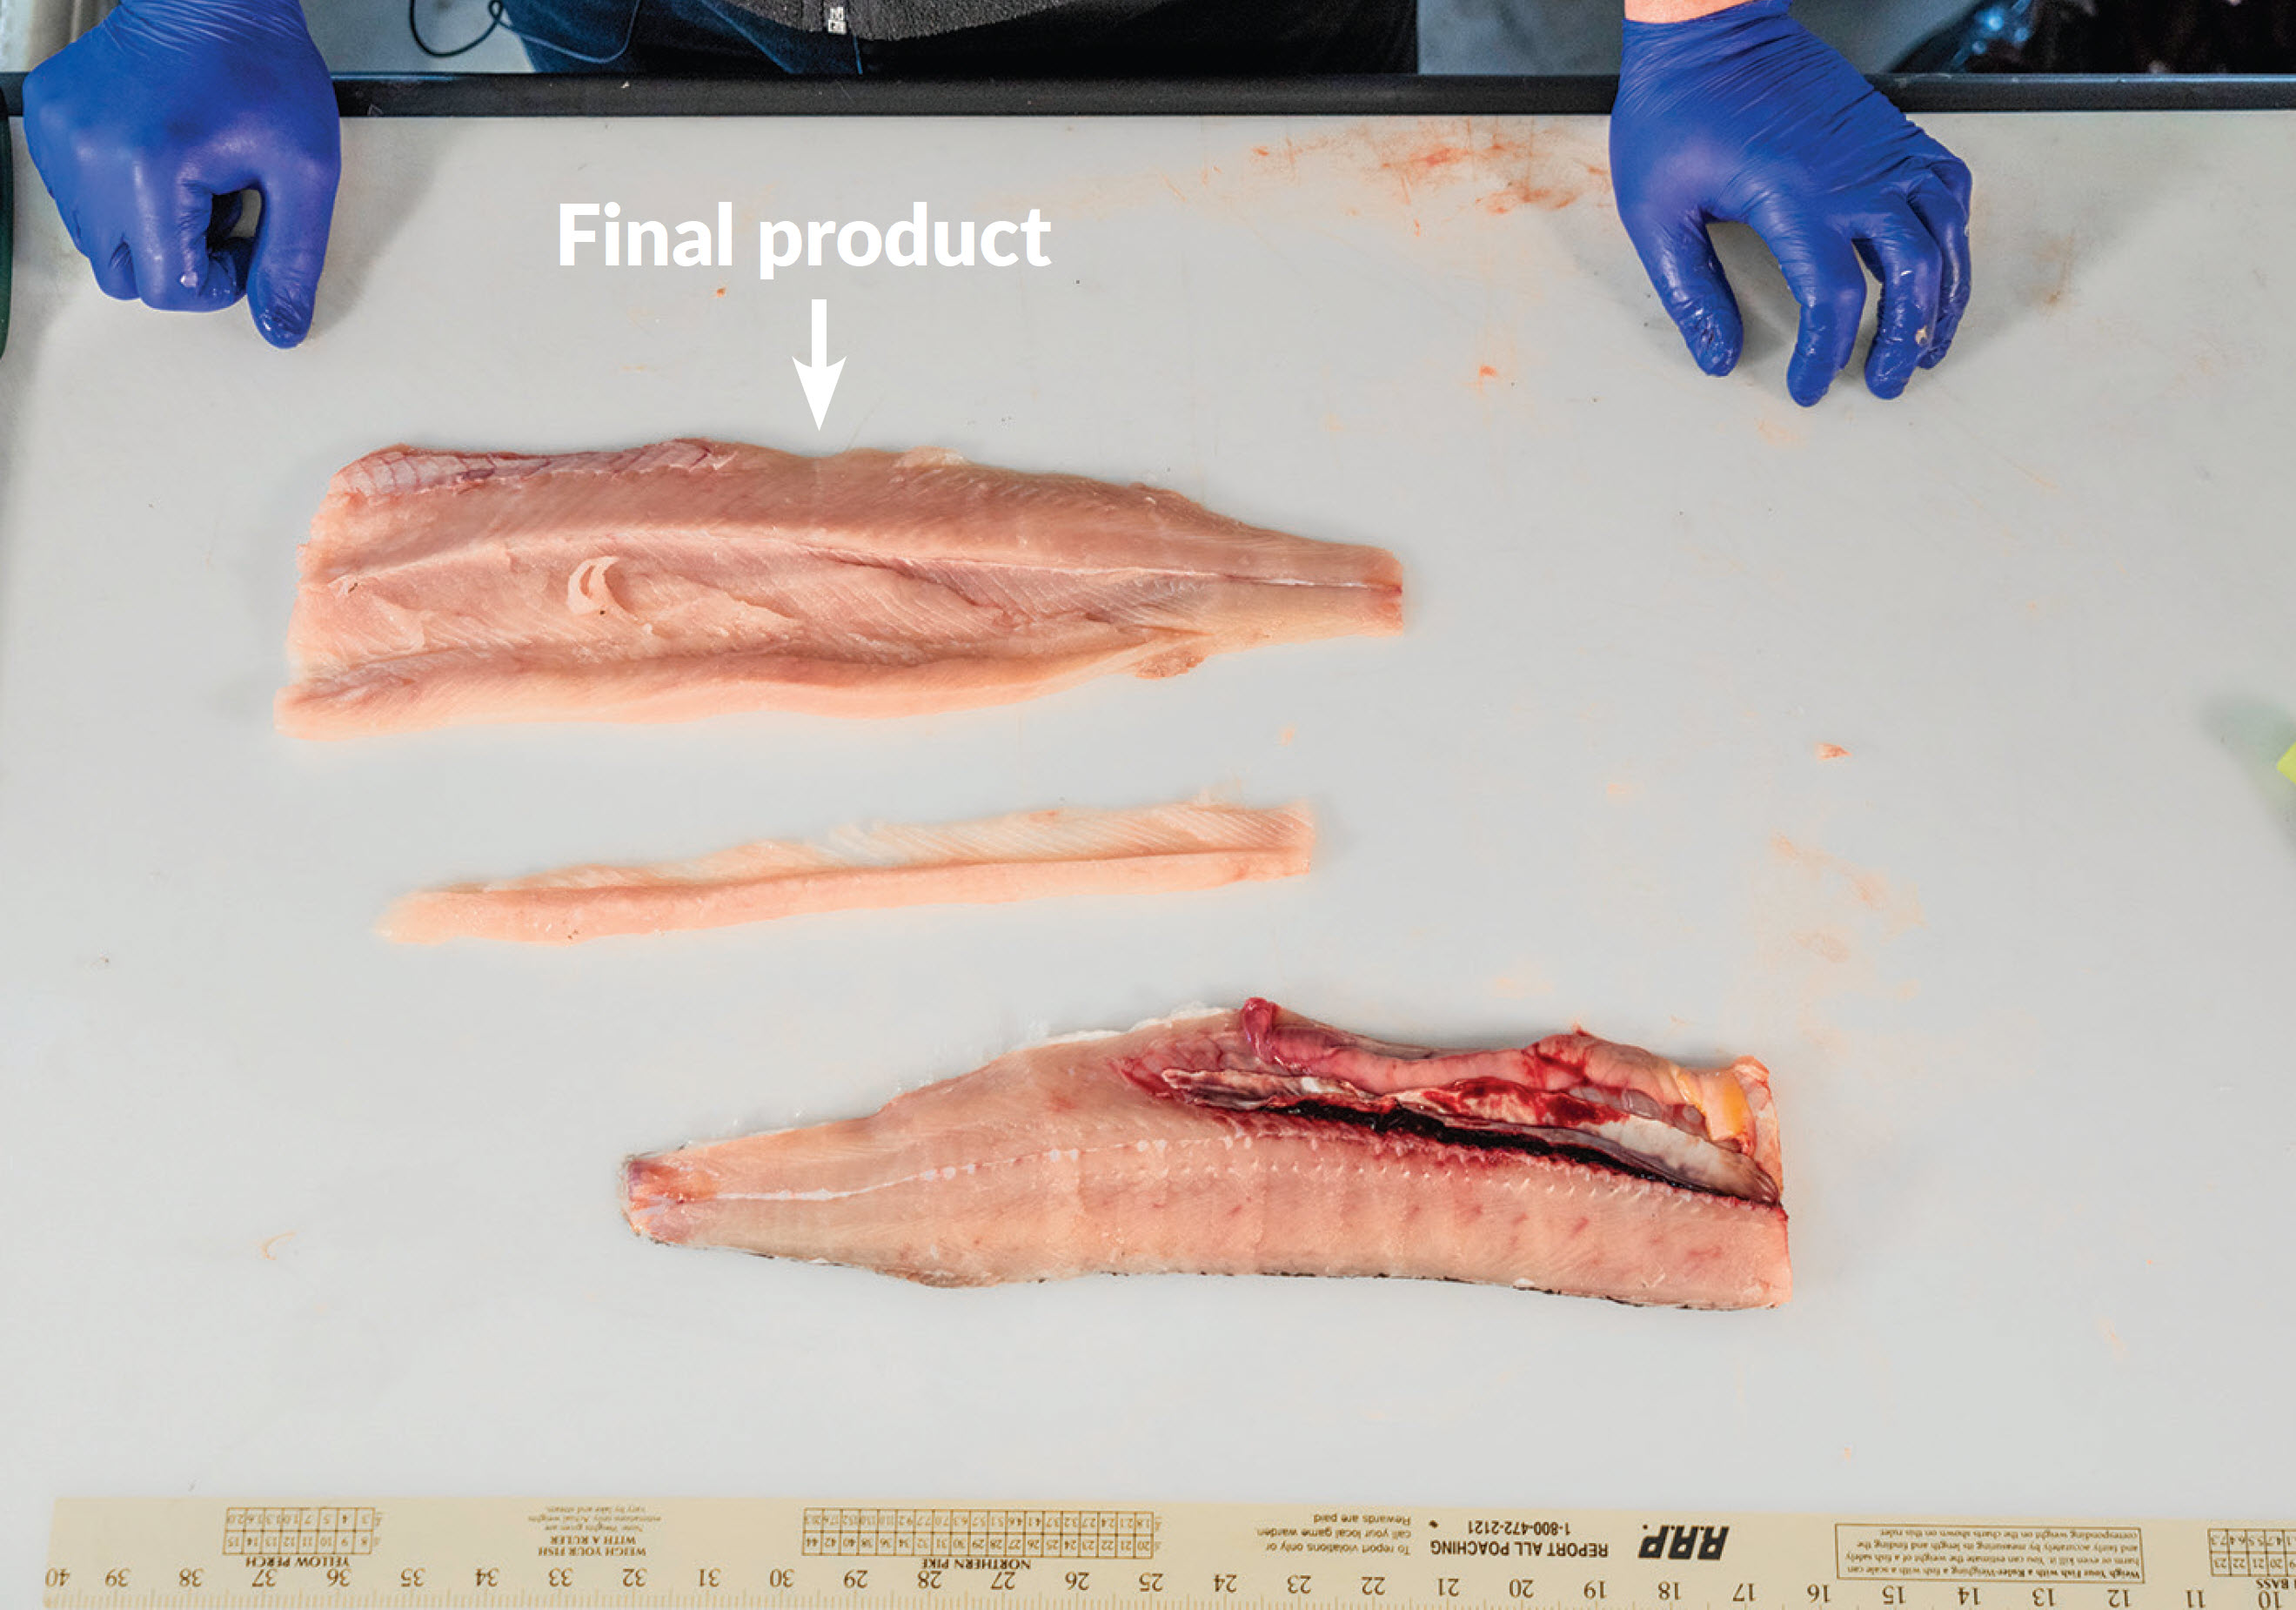
Final Product
Congratulations, you have successfully removed the Y bones from a delicious northern pike fillet.
Repeat this process to remove the Y bones and skin for the other side.
This technique produces excellent boneless pike, but like any filleting, it may take some practice to master.
Until you are more comfortable removing the bones, we recommend practicing at home.
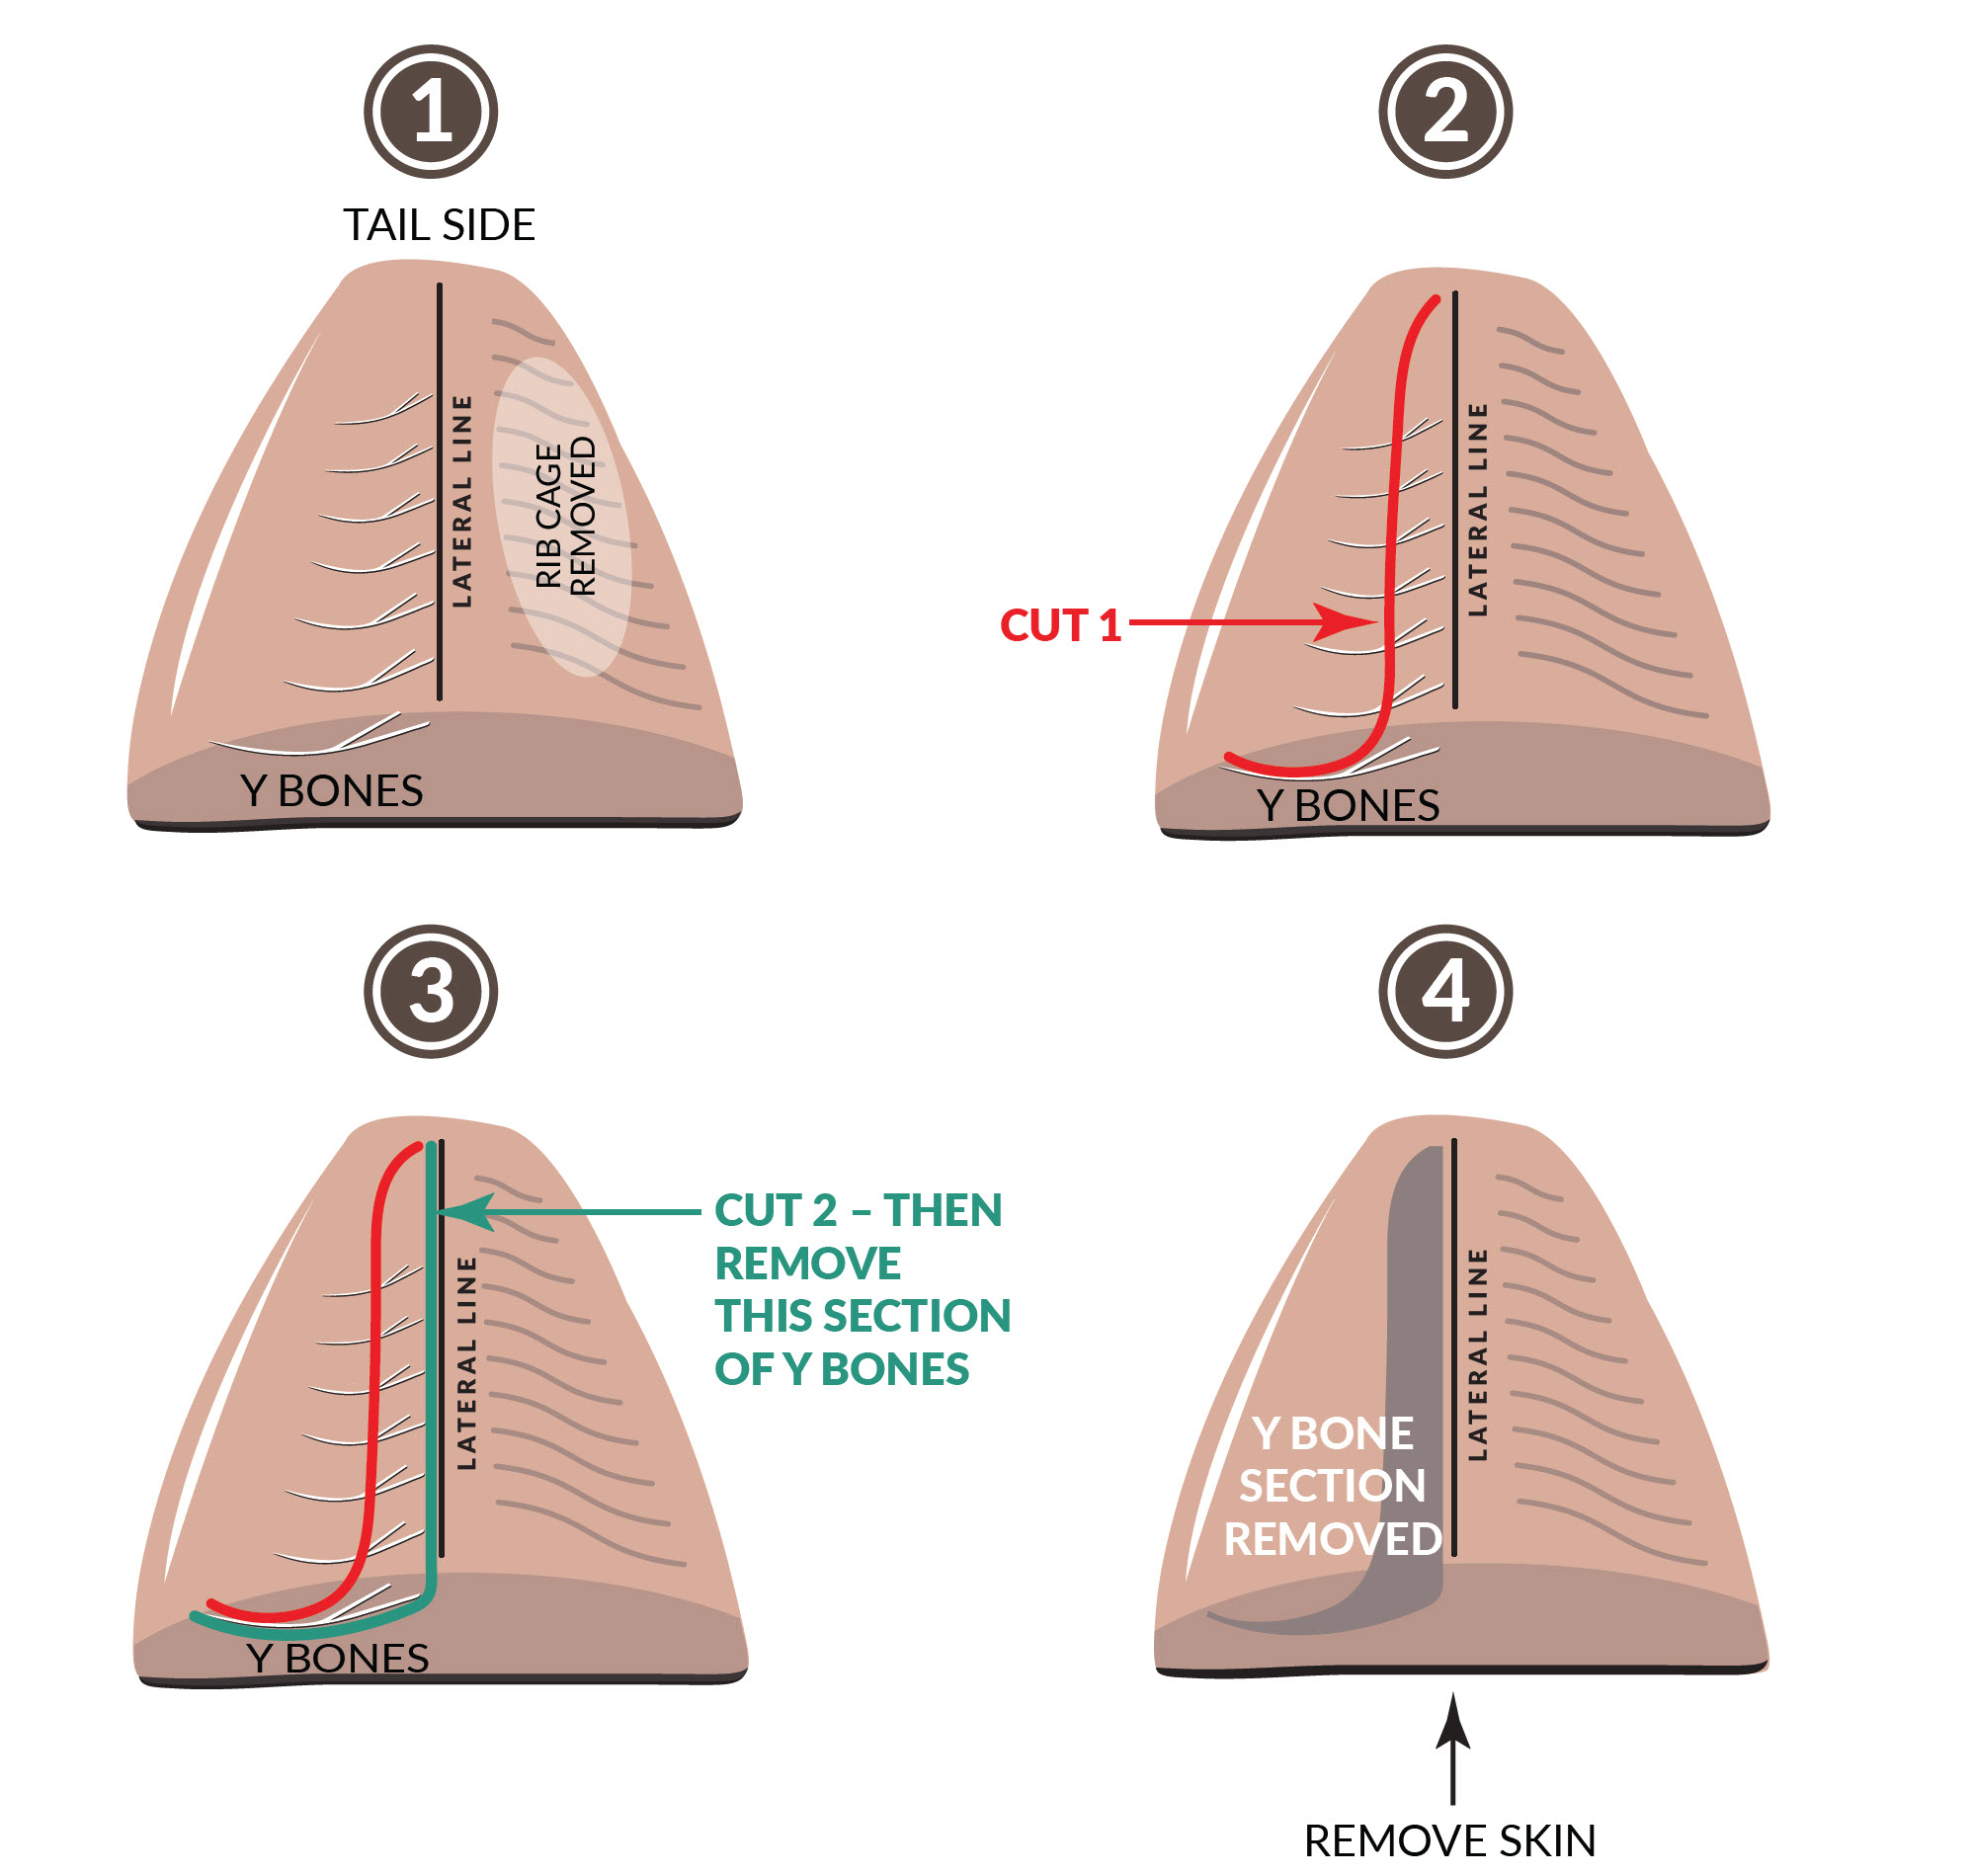
Illustration of Northern Pike Y Bone Removal
Repeat steps for the other side of the fillet.

